Dodge Viper
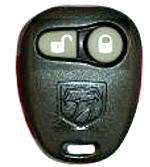
FOB
Keyless Remote Programming Instructions
Also available in some Owners Manuals.
NOTE:
We highly recommend you let your local Dodge Dealer program this for
you.
1)
Turn ignition to OFF.
2) Locate the Data Link
Connector; it’s a black 16 pin connecter that is under the driver's side
dash, right where your right knee would be. You have to look up into the
dash from below to see it.
3) Ground pin 1 of the Data
Link Connector by taking a wire or paper clip and running it from pin 1
to pin 4. Pin 4 is ground so you can just short pin 1 to 4 and it will
be grounded. Grounding pin 1 tells the system you are ready to reprogram
it.
4) Close all of your doors.
5) Turn the key to ACC then
back off. The power door locks will lock/unlock. This is the signal that
the system is ready for reprogramming.
6) Push a button on your key
fob, doesn't matter which button.
7) If you have 2 key fobs,
then press a button on the 2nd fob within 1 minute of pressing a button
on the 1st fob. Both must be programmed at the same time. If you only
have 1 fob then press a button 2 more times to signal that you only have
one.
8) The doors will lock/unlock
to signal the codes were received.
9) Remove the jumper wire
from the data connector.
Customer Question:
I was under the impression that grounding the green wire was only good
for Gen 1 cars. Does it work on Gen 2 also?
Viper
Club answer:
Yes it will work for the Gen II, but the green wire is located in the
DLC data link connector under the dash to the far left. I took a piece
of wire and actually stuck it in the pin and then grounded it when I was
ready.
NOTE:
Please realize the ‘The Viper Store’ assumes no responsibility for
customers who attempt to program this Remote Keyless entry FOB by
themselves.