TheViperStore.com
Dodge VIPER SRT-10
(2003-2010)
Convertible
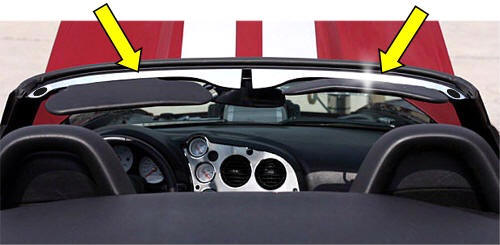
Overhead Windshield Caps 2pc
Part #
ACC-972033
INSTALLATION INSTRUCTIONS
Parts Included: 1-Passenger Side Windshield Top Trim, 1-Driver Side Windshield Top Trim, 1-Test Strip, 1-Adhesive Promoter Pen.
Your may
come with
a clear protective liner. If so, Do Not Remove until instructed to do
so.
VERY IMPORTANT - PLEASE READ ALL
INSTRUCTIONS BEFORE BEGINNING YOUR INSTALLATION! You must follow these
instructions or your new part(s) may not adhere.
If you remove the back read liner or scratch the surface of the trim it is
not returnable.
1. BEFORE YOU BEGIN YOU MUST FIRST PREP THE SURFACE IN ORDER
TO ALLOW ADHESION. You do this by scrubbing the entire area with
household Isopropyl Alcohol (or rubbing alcohol) found at most
grocery stores and all hardware stores. Scrub the are vigorously to
remove any hint of oil.
2. Once properly cleaned take the piece of test strip tape
included and remove a portion of the back red liner. Stick the test
tape strip to the area where you will be mounting your new trim. Test
several areas. If it is tacky and sticks then proceed to the next
step. If it is not sticking very well in any of the spots you tested
then re-clean the area until the test strip sticks to all areas.
3. Take Passenger Side Trim
piece and without removing the back red liner - hold it up to where it is to
be mounted. Line up the oval hole carefully. See how it fits.
If the piece does not fit properly - STOP. Call us.
Become familiar with the way it fits into place. Now peel off
the clear plastic top liner (if there is one).
4. Take the Adhesive Promoter Pen or packet and open it. Swab the area where you are going to mount your trim with the clear liquid. It will not stain or harm your car body or interior. It is designed to help the trim piece stick better to the surface. Let dry for 2-3 minutes.
5. Remove the red back liner and hold the trim piece slightly above where it is to be mounted. Do not touch it to the surface yet. Carefully maneuver the trim to the exact spot and gently set it into place without pressing on it. Make any final tiny adjustments necessary.
6. Now Push along the entire
surface starting in the center and working your way out.
7. Repeat the process for the
Drivers Side Trim. Keep the trim clean with a mild glass cleaner.
This Frame has opened up into a New Window