
DODGE VIPER
RT-10/GTS Head Light Eye Brows
PART #ACC-V962016
INSTALLATION INSTRUCTIONS
NOTE: Your new covers come to you with a clear protective liner. Do not remove liner installation is complete.
PARTS INCLUDED:
2 x Chrome Eyebrows
2 x Chrome Molding Strips
1 x Adhesive Promoter Pack
1 x Adhesive Promoter Tube
1 x Plastic Squeegee
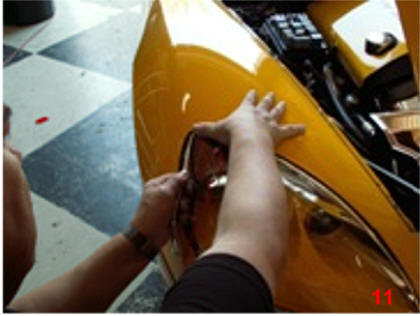
This headlight kit comes to you with a clear protective liner. Do not remove the liner until the end of step 2.
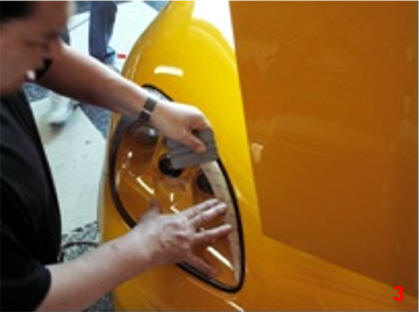
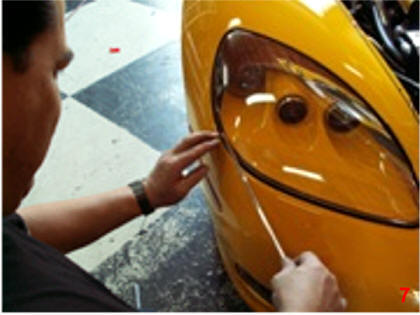
- Clean your headlight first with soap and water and then with household isopropyl alcohol and let dry. Then swipe the area ONLY where you will be placing your new cover with the adhesive promoter packet (provided). BE CAREFUL NOT to apply the adhesive promoter to the clear area of the lens where the chrome will not be covering because it will leave a visible smear. Once you have carefully applied the adhesive promoter correctly you may begin the installation.
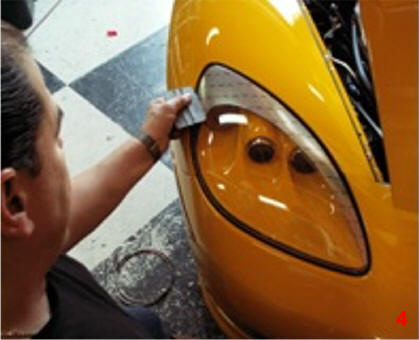
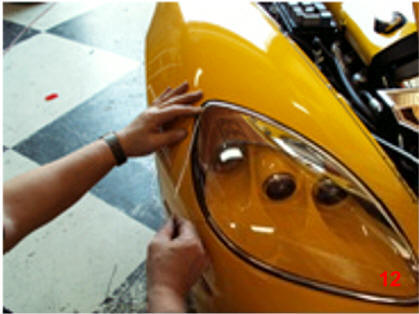
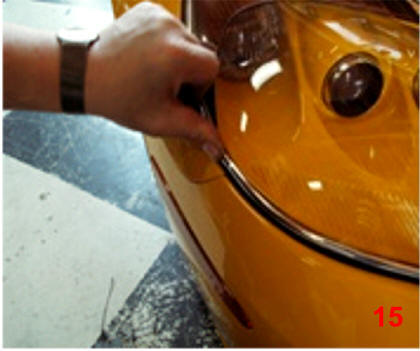
- Please refer to pictures as you continue thru steps 2 and 3. Place the new cover over the headlight so that it fits along the upper edge of the headlight and make note of its position. If positioned correctly you will have about a 1/8” space between the edge of the eyebrow and the edge of the light. NOTE: This space will be covered by the chrome trim in the following steps. Once this position is clear you may begin permanent installation by peeling the release liner of the underside and carefully reposition the new cover starting from the small side and working your way to the larger section making sure that you use the plastic squeegee (provided) to press down on the cover nice and evenly to attach it without any air pockets. Remove the protective liner.
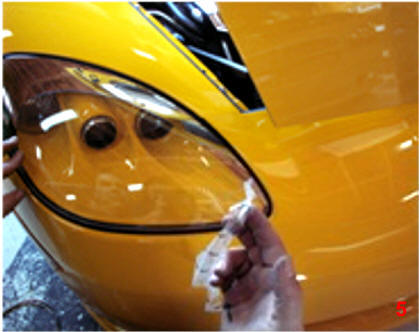
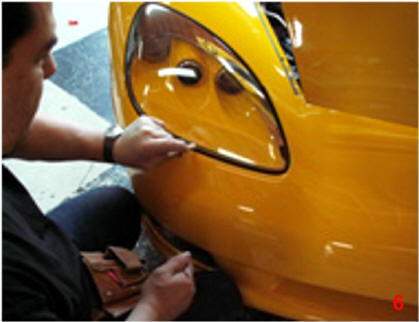
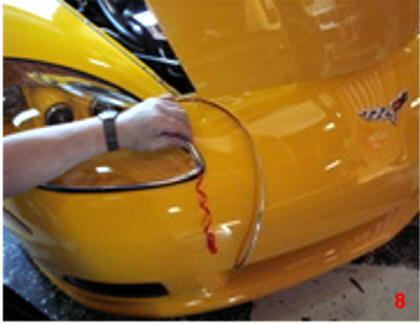
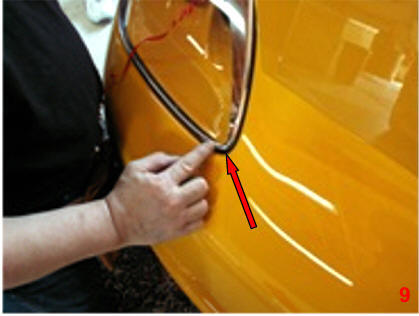
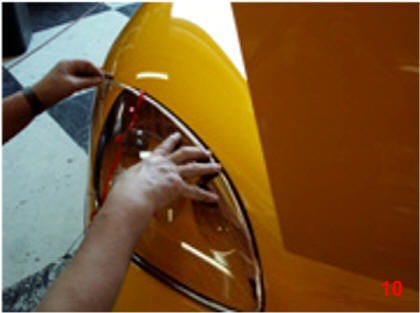
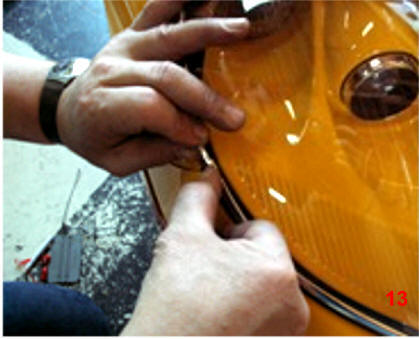
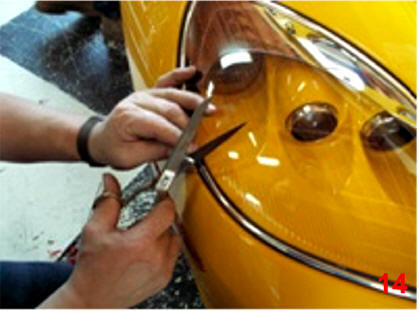
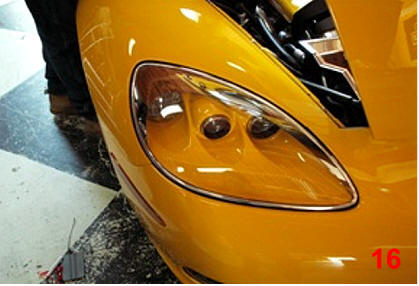
- You have been provided with a length of chrome trim. This trim is designed to cap the headlight cover you just installed and to border the entire headlight. Apply a small bead of the adhesive promoter from the tube (provided) around the edge of the headlight. Then begin placing the trim starting at the body seam by the headlights edge directly to the top side of the lens NOT to the side of the lens covering the 1/8” gap created during placement. Work your way around to the start point pulling the red release liner as you go. As you approach each corner pre-bend the trim between your fingers and your thumb so that the trim takes the shape of each corner without forcing. Allow the trim to slightly strap the side of the lens at the two corners only. (Please refer to pictures). Then continue to pull release liner and set in position. Once you come to the start point mark the overlap slightly longer then trim the molding on the mark with a pair of scissors. Buckle the two ends together and press firmly to set a nice tight seam. Press the entire trim to permanently set. Repeat steps 1-3 for opposite side. TECH TIP: Use a little instant adhesive at the butt seam to eliminate separation or shrinkage of the molding over time.
NOTE: After installation DO NOT GET
WET FOR 24 HOURS.
IF ANY QUESTIONS OCCUR DURING INSTALLATION PLEASE give us a call 352 688
8160 M-F.
Page 2 (NOTE:
Corvette used in example photos. Same install for Viper)


Red Arrows: 1/8" space here
Apply to top edge.
Allow to swing over the corner side, then
back up to the top of the lens.
Page 3 (NOTE: Corvette used in example photos. Same install for Viper)
Page 3
(NOTE: Corvette used in example photos. Same install for Viper)
TheViperStore.com a
HotCarAccessories.com website