DODGE Viper Gen 2 Front and Rear Caliper Covers
PART # ACC-962033 or ACC-962034
INSTALLATION INSTRUCTIONS
Included: Right and
Left side Caliper covers, adhesive promoter packet.
1. Jack up your viper and set on jack stands for safety then remove one front wheel and one rear wheel.
2. Before you take the protective liner off each part - Hold a caliper cover up to each wheels caliper to make sure it fits properly on your Viper. Now that you know that each cover will fit your car you can remove the remaining wheels from your Viper.
3. Thoroughly scrub
clean all four calipers. It is crucial that this step be done completely
thoroughly to insure a good reliable bond. Apply some common masking
tape to all the areas to see if you have achieved a tack able surface.
If the masking tape sticks then swipe the area of the calipers to be
mounted with the adhesive promoter provided.
This chemical is key to establish a good reliable bond long term. This
chemical is not a cleaner but an adhesive accelerator and must be used
as such to insure a permanent bond
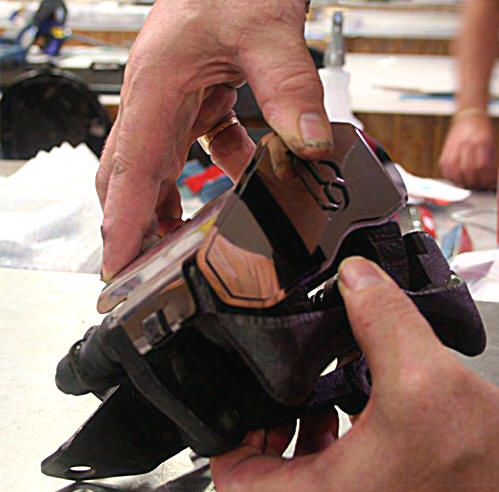
4. Once you have cleaned and prepped the caliper surfaces you can now install your new stainless covers with confidence. The front caliper cover is a two piece installation. The long scalloped cap cover will need some additional preparation to attach this piece. Your kit comes to you with a small abrasive pad. Use this pad to scuff the underside of the long scalloped cap as well as the area of the caliper bracket that is covers buy the new cap. Then swipe the area once again to make sure it is perfectly clean. Apply a small pile of pure 100% clear silicone at the two ends of the caliper bracket. This silicone will work excellent to bond the new cover to the caliper bracket. It is not affected by heat and is an excellent all around adhesive.
5. The next piece will have enough surface area for the 3M attachment tape to work perfectly to insure this piece will stay boned permanently. The key hear is to tweak the shape of this piece so that it matches the surface of the caliper perfectly. Although the piece comes to you pre shaped it will need to be shaped further to make sure it will make 100% contact with the caliper. This can be done very easily by hand gently forming the part until you are ready to set the piece permanently in place. Simply peel the red release liner from the back of the piece and then firmly press it into place. Remove the protective liners to finish that install.
6. All the remaining pieces for the calipers are to be applied in the exact same way. Tweak all the shapes well then peel and stick. Be sure to press very filmy along all surfaces to insure a good long lasting bond. Then remove all protective liners and the reinstall all four wheel to finish this installation.
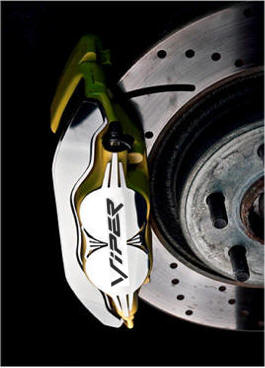
7. The front caliper section also will utilize the silicone for installation however this piece will a snap over the main caliper bracket. This is a design upgrade and you will notice that there is a small square casting protruding from each end of the front caliper bracket. In order to install this piece you will need to release the caliper from rotor completely. Then apply your silicone to the two shoulders of the caliper bracket. Then slide one side over one square as you force the opposite side to snap over the other square. Then bend the tabs at both ends to make Sure they are properly folded over. These two tabs of the cover must be completely folded over to avoid any contact with the rotor once it is reinstalled. Remove the protective liner and then reinstall the caliper to finish the installation.

REAR Caliper Covers
Front Caliper Covers