|
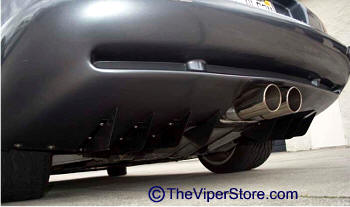
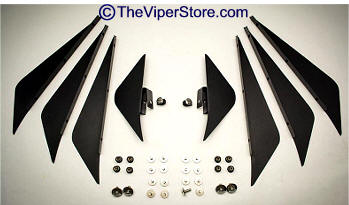
Note: This all new power coated stainless steel air foil kit has been designed to fit the factory bolt locations of the GEN 1 Convertible Viper only. However, it may also fit other vipers as a universal application.
Installation Instructions: 1. Remove all of the factory bolts under the car (These will be replaced with stainless bolts).
2. Once all of the factory bolts are removed, you can begin on either side by placing the first foil (Note that placement of the first foil is important because it will determine the position of all remaining foils). Place the foil along the frame rail running alongside the exhaust port, so that the bent tap faces to the outside of the car, and align the holes in the tab with the factory holes.
3. Loosely insert the large slotted head stainless steel bolts into the factory clip nuts, but DO NOT tighten just yet.
4. Using a yard stick or available straight edge, place the straight edge along the cars’ frame so as to allow you to align the foil nice and straight. Then make it snug using your larger flat blade screw driver, but do not tighten just yet.
5. Set the next two foils in place at the next two factory clip nut bolt holes - front bolts only. Make it snug, but as stated before, do not tighten.
6. In this part of the installation, you will need a ruler to arrange each of the foils approximately 4 ½” inches away from each other. This can be done by utilizing the horizontal slotted hole in each tap of the foils. While making sure the first foil remains nice and straight, tap all the foils gently to arrange them 4-1/2” inches from each other. Once they are all lined up, tighten the first foil. Then, tighten the front bolts of the other two aligned foils. Double check their alignment to make sure they have all remained properly in place and make any adjustment if necessary.
7. Mark the two foils remaining holes to the cars’ body with a permanent marker and make a dead center dot.
8. With everything nicely in place, slide the two foils over to expose the center marks you have made. Now you will need to drill all four locations using a ½” inch step drill bit. Although there are many ways to drill a half inch hole, using a step drill (not included) will be the easiest and most accurate tool to use.
9. Now that all four holes have been accurately drilled, insert the four ¼-20 rubber well nuts provided. Simply push them into the new holes until seated. Slide the two foils back into their proper positions and re-measure to insure accuracy. Tighten all bolts firmly.
10. You have been provided with two extra stainless bolts and washers. These have been provided for the two remaining factory bolt locations to match all the new hardware.
11. The next step will be to remove the factory rivet right next to the exhaust tip to allow you to install the final foil for that side of the Viper. Using the step drill bit, drill out the aluminum rivet. This rivet may tend to spin in its hole as you are drilling. If this happens, tilt the bit at an angle to sort of carve the head of the rivet loose. Then you can drill the shaft of the rivet out to create a ¼” hole.
12. Now you are ready to install the smaller remaining foil. For this part, you will use the foil that will allow you to position and set the mounting clamp towards the exhaust tip and not towards the outside of the car like the other three foils.
13. You have been provided with a ¼-20 clip nut. Slide this clip nut over the top hole in the small foil so that it snaps into the hole, locking the clip onto the upper tab. Make sure the upper clip aligns with the lower slot by screwing in the remaining stainless bolt. Use a needle nose plier if necessary to make an alignment (This will be very helpful to make the final attachment).
14. Now that your foil has been prepared simply remove the bolt and then slide the correct foil over the exhaust opening and align it with the rivet hole exposed. Then, loosely insert the bolt into the client. Measure the small fin to 4-1/2” and parallel to the first foil. We have noticed that because these Vipers were usually built by hand, the rivets can be offset on some units; so, the rivet removed earlier can be a little offset to one side or the other. This may cause the space of the small foils to have a tolerance of 1/8th of an inch or so. This may cause the space of the small foils to be forced to be greater or less than 4-1/4 inches. If this occurs, we have found it to be unnoticeable; however, if you’d like to fix this, elongate the factory rivet hole towards one direction or the other, to compensate for this position. 15. Once you are satisfied with the placement, firmly tighten the bolt, finishing the installation for that side. Repeat the entire installation procedure for the opposite side.
Technical Help call: (727) 861 1500 M-F 11:00a-4:00p EST
|