
DODGE VIPER Door and Fender Emblems
INSTALLATION INSTRUCTIONS
Applying your new Logo(s):
1.
First, wash the area where your current logos to be replaced are with soap
and water. .
Let it dry for a couple of minutes.
2. IMPORTANT: Next scrub with rubbing alcohol thoroughly to remove any invisible oils.
3.
Now take the packet or small pen of 'promoter' provided. Apply the
clear moist promoter appliqué to the exact area you are going to mount your
emblem(s).
The promoter will not hurt your cars paint. Any excess can be wiped
away with rubbing alcohol.
The foil packet has a moistened sponge inside. If you get the "pen"
applier bend the pen so the class ampoule inside breaks. Then push the
spongy tip against a clean piece of paper to get the liquid to flow.
Now you are ready apply it to your surface.
IF you have to remove an existing emblem continue. If you do not
skip to step .6
4. Take the pink scrapper (included) in your kit and gently pry and push
off existing emblem(s) of your stock emblem that is currently on your car.
5.
Once you have removed the emblem you should have slight residue outlines
where each letter was. This will help you gage where to place your new
logos.
6.
It is time now to install your new emblems. First hold the emblem up
to where you are going to mount it to and see where you want to mount it.
Whoever mounts these new logos
should have a good eye for mounting them straight (that is perpendicular to
the ground).
7.
either use the piece of test tape we provided (even a piece of
regular masking tape will work) and try sticking it to the surface you
cleaned in several places.
If it sticks continue the step 8. If not re-clean until it sticks.
8. Take one of your new emblems and gently peel the white stiff paper backing off
(Diagram A). You will be left with the logo stuck to the clearish top
liner.
Hold the emblem up to where you would like to mount it – at first without
touching your car to get comfortable of where it will be placed.
Once you are certain where you want to mount the logo slightly touch the
logo to the cars surface. Make any last tiny movements.
Once you are satisfied press down on the entire surface of the logo. Then
press firmly along the top of the entire surface to ensure a tight bond.
Now very gently pull off the top clear liner, see Diagram B.
Now wipe down the letters and the car surface around them. Any residue left over from the original logos can be removed with rubbing
alcohol.
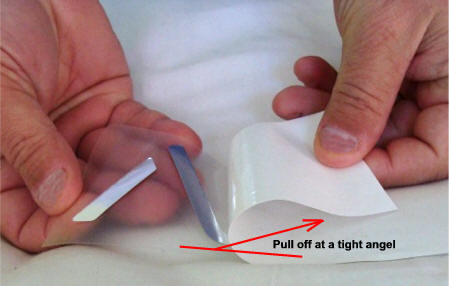
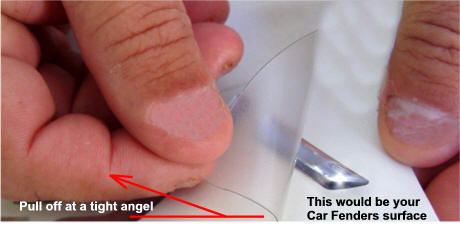
Diagram A
Diagram B
Once the emblem is on your cars surface peel off the top liner.


