|

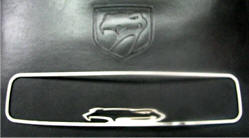
DODGE VIPER Rear View Mirror Trim
with Logo
PART
ACC-DVMT206 and
207
INSTALLATION
INSTRUCTIONS
Items Included:
One
chrome trim ring with Viper head, Adhesive promoter pen
Your new trim part may NOT stick to the inside surfaces
of your car!
IMPORTANT! - READ THIS BEFORE YOU INSTALL YOUR PART(S)
In many situations interior panels and surfaces become saturated with
silicone chemical such as Armor-All (even if done years ago), or other
forms of residue. Although this makes the door surface look nice these
chemicals become embedded into the ABS plastic of your door panels or
dashboard. These treatments must first be removed in order to prepare
your surfaces to be bonded to.
This removal can take some doing in most cases, the best way we have
found to remove these treatments is to apply several different solvents
to break down these chemicals.
NOTE:
Apply this cleaning process to only the surface areas inside you vehicle
where you will be sticking your new interior trim parts.
STEP 1.
First scrub the area where the interior trim piece is to be applied with
a 511-SOLUTION:
5-parts warm water
1-part regular household ammonia
1-part plain liquid dish detergent
Use several cloths and change them frequently
STEP 2. Next you will need to scrub the area to be applied with
the small abrasive pad provided. Then remove all residues with household
rubbing alcohol by forcibly scrubbing the area then immediately wiping
off the wet alcohol with a clean paper towel. Be careful to only do
this procedure to the area that you will be applying your new accessory
to.
STEP 3.
Repeat step two again only this time use household Acetone (found in any
hardware department) instead of the rubbing alcohol. After you complete
the acetone treatment your surface area should look dry and ashy
looking.
NOTE:
If this ashy look is apparent to any area that your new accessory
does not cover - you can simply apply armor-all to the area AFTER you
have completely installed your trim part - and it will disappear.
NOTE:
You may have to repeat the cleaning process several times
depending on your surface.
STEP 4. Included is a small piece of 3M automotive attachment
tape (included). This is a test strip. Peel back the rear red liner
and stick a corner of the tape to the surface of your interior where you
plan on sticking your new trim piece. If the test strip of tape sticks
readily proceed to the step 5.
NOTE:
If it does not stick firmly begin the cleaning process over again
until it does.
STEP 5.
Once you have completed these steps you can then apply a single thin
swipe of the adhesive promoter in either a wipe format or a sponge tip
pen (provided with your accessory). This clear odorless liquid will
prepare the surface a tight stick for a permanent installation.
Now continue on with your installation.
Installation
-
Wash your
Vipers’ rear view mirror with a good glass cleaner. Next, take some
rubbing alcohol and wipe along the perimeter of the glass mirror
where you are going to mount the trim. It is imperative that you
remove any oils from the glass.
-
Take the Rear
View Mirror Trim without removing the back liner and hold it up to
your rear view mirror. Practice positioning it to see how it fits.
Once you are comfortable with the fit remove the liner from the back
to expose the automotive tapes sticky side.
-
Take the
Promoter Pen and snap it in the middle to break the ampoule inside.
Press it down on a piece of cardboard to get the liquid promoter
flowing. Very carefully using the promoter pen apply the promoter
along the perimeter of the glass rear view mirror. This will help
to enable a tight bond when you install the trim.
-
Carefully and
slowly hold the trim over the mirror. Gently maneuver it into
place. Do not press it down at first. Once you are comfortable with
the position press the trim down on to the mirror glass. With your
fingers press firmly all along the trim piece so that it sits
completely flat on the glass mirror.
-
Let dry
overnight before touching or exposing to sunlight or extreme heat.

TheViperStore.com a HotCarAccessories.com website
2006-2012 copyright |